Pages

Showing posts with label recipe. Show all posts

Tuesday, June 12, 2012

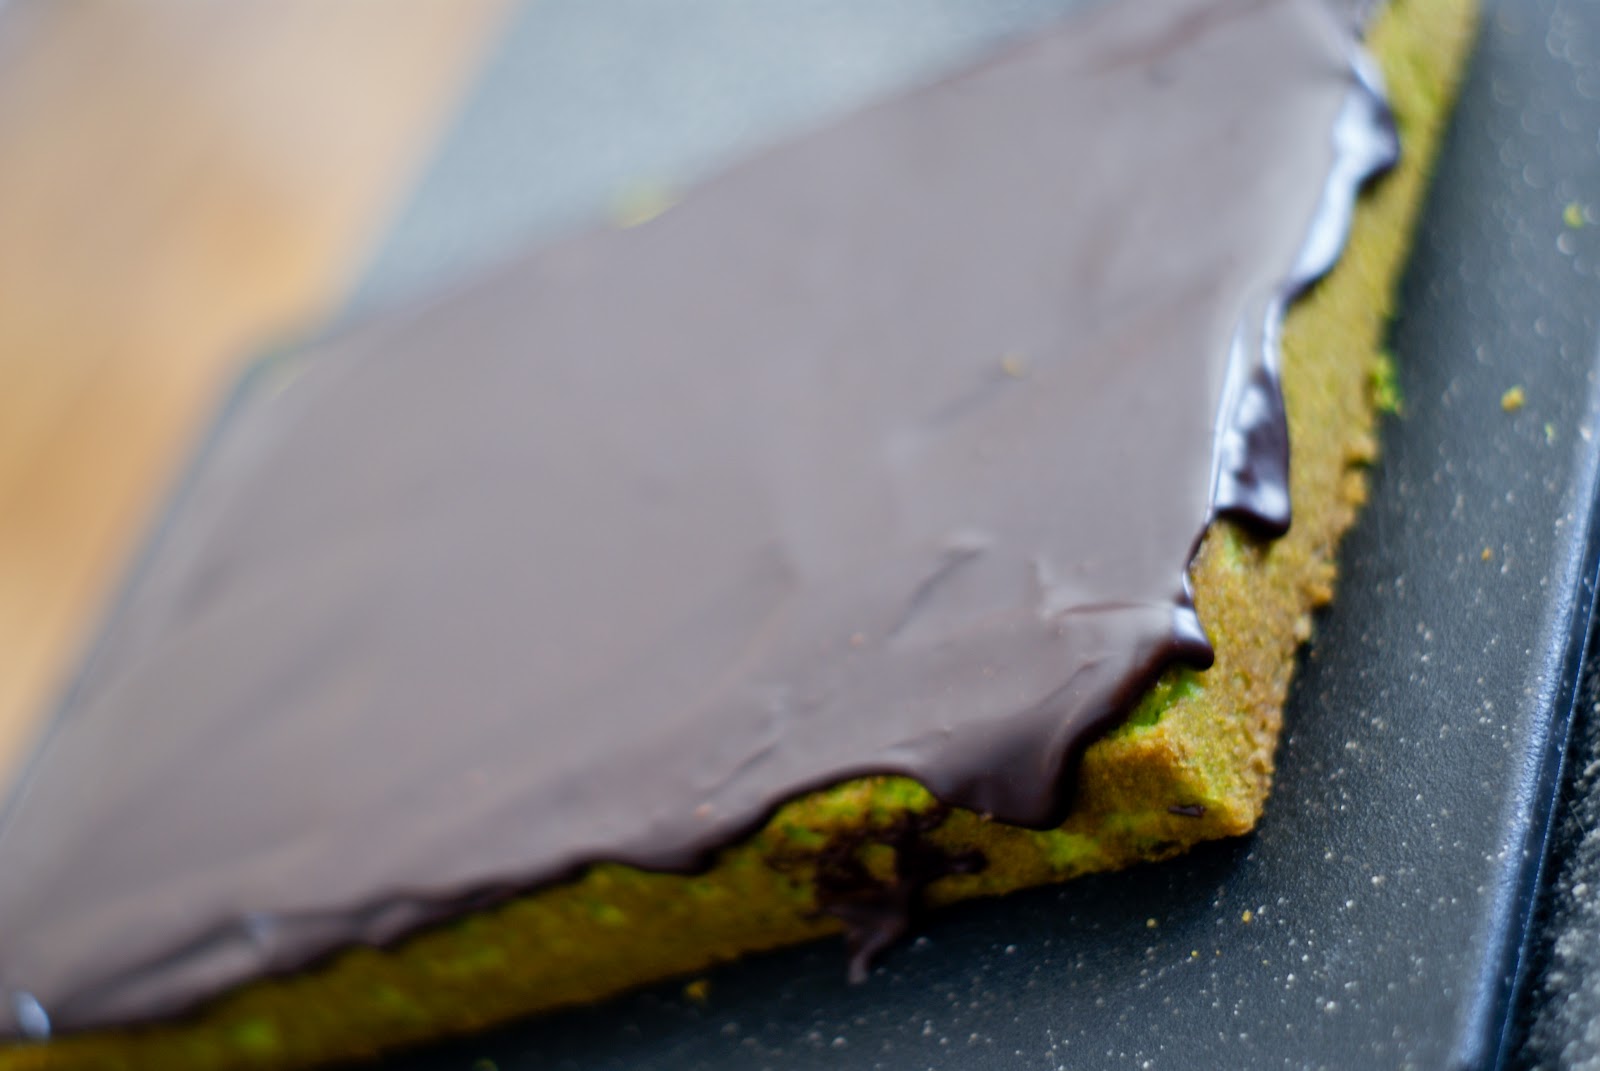
lemony angel food cake

We are overflowing with strawberries around here. I’m loving strawberry season. I still plan on making some jam but I wanted to make a delicious dessert for after dinner. I wasn’t feeling straight up strawberry shortcake. So after perusing Pinterest for a bit, I came across a lemony angel food cake that sounded delicious. I happened to have a bunch of lemons left over from a different recipe so this was perfect to use up some ingredients before they went bad.


This was the pin-spiration for the dessert:


Really it was completely delicious. The cake by itself was totally addicting. Every time I walked by the leftovers I cut myself a tiny slice and munched on it. I was really happy with the results. I could have whipped the egg whites a little bit longer and it would have been a little fluffier, but it was delicious. The recipe I used said to add the lemon juice, zest, vanilla and cream of tartar before the egg whites were at stiff peaks and I don’t think that was the best plan. I couldn’t get them to whip all the way up to firm peaks, even beating them for 15 or so minutes.


SONY DSC


Lemony Angel Food Cake
(adapted from Martha Stewart)


1 cup sifted cake flour
1 1/2 cups sugar
12 large egg whites
2 tablespoons lemon zest
4 teaspoons lemon juice
1 teaspoon cream of tartar
1 teaspoon vanilla extract
1/4 teaspoon salt

Directions:
  • Preheat oven to 325 degrees. Prepare a 12” cake pan by spraying with non-stick cooking spray.
  • Sift together cake flour and 1/2 cup of the sugar.
  • Beat egg whites until soft peaks form, then add in lemon zest, lemon juice, cream of tartar and vanilla extract. Beat for an additional 1-2 minutes until soft peaks return.
  • Add the rest sugar gradually while beating to firm peaks but not stiff peaks.
  • Fold in the flour/sugar mixture.
  • Pour into prepared pan and bake 40-50 minutes until golden brown and a toothpick comes out clean.

Tuesday, June 5, 2012

coconut raspberry macaroons

**before we get going here - please ignore some bad formatting! I've been trying out Windows Live Writer and when I upload some of the formatting seems to be a bit off...ugh. Tips or advice are appreciated!!"


Let’s talk Pinterest for a minute. I’m addicted. You are too right? I’m not sure I know anyone online or in “real” life that doesn’t have an account. My cousin’s husband even has an account where he pins all of his favorite vacation ideas and home renovation ideas. The first time I got an email that said G has repinned your pin, I actually laughed out loud. Then after a full day helping my sister and brother-in-law help redo part of their roof, I saw a big article on Pinterest in a wedding planning magazine. It really is everywhere. The problem with it though is that we pin all of these gorgeous, delicious ideas and never execute them! I’ve decided to put an end to that! At least once a week (hopefully on Tuesdays to share my results on Wednesday for the OHP linkup) I’m going to attempt something I’ve pinned. It could be anything, an outfit, a dinner, a workout, just do it already! I have 753 pins, so it may take a while…But I really want to put these to good use!
So, to start off my Pinterest to real life series, I made this pin:
First thing first, I adore Smitten Kitchen. It is one of the first food blogs I started reading and every single recipe that I’ve made from her blog has been absolutely amazing. When I saw that these macaroons were from her blog, I had to try them. Plus, I have an insane amount of fruit (strawberries, raspberries, watermelon, peaches) in my house right now that were perfect for these!
SONY DSC
SONY DSC My cookie batter was a little more wet that it should have been which lead them to bake with little puddles around them. I was being impatient and didn’t let the raspberries dry as much as I should have before adding them to the coconut mixture. Also, I only own a tiny food processor, a mini chopper really, and had to blend in batches. I stirred the raspberries in instead of chopping them in with the food processor which I’m sure made a bit of a difference.
SONY DSC
SONY DSC
You can see the puddles I was talking about here. I don’t think that it made a difference with the flavor or texture, but they took a bit longer to bake and that puddle part was a bit chewy, but the rest of the cookie had a great texture!
SONY DSCYum.
Ok, so on with the recipe. I cut mine in half from what the original from Smitten Kitchen had, but I didn’t make any changes aside from that.
Raspberry Coconut Macaroons
(Originally from Smitten Kitchen)
Printable Recipe

200 grams sweetened, flaked coconut
65 grams granulated sugar
45 grams egg whites
pinch of kosher salt
1/4 teaspoon almond extract
85 grams fresh raspberries – remember to dry them very well.. That was my downfall in this recipe.

  • In a food processor finely mill the flaked coconut. In my mini processor it took 2-3 minutes to get it in tiny enough pieces
  • Add in sugar and process for about a minute
  • Add in egg whites, salt and almond extract, process again for about a minute.
  • Transfer mixture to a bowl and gently stir in the raspberries.
  • Scoop into 1 inch balls onto a lined cookie sheet, I used a silicone mat.
  • Bake at 325 until the tops are nicely toasted, it took about 45 minutes for my wet batter to get there – but the original recipe says 20-30 minutes.
Let cool and enjoy…


Thursday, March 15, 2012

it ain't easy being green

Saint Patrick's Day is almost here! Are you enjoying any festive foods? Are they tradition Irish foods or just oddly colored normal foods?
I'm sharing one of each with you today! I'll start with my favorite version of soda bread.
The recipe couldn't be easier, and it is incredibly delicious!


Soda Bread
4 cups flour
1 1/2 teaspoons baking soda
1 teaspoon salt
2 tablespoons sugar
10 tablespoons butter softened - but not melted
2 cups buttermilk
1 teaspoon sugar
1/2 cup raisins (totally optional!)

Preheat oven to 400 degrees. Mix together the flour, baking soda, salt and first 2 tablespoons of sugar. With your hands, work in butter until it is well blended. Stir the buttermilk in, I like to use a fork. It comes together into a nice shaggy dough. This is when you'll add in the raisins if you're including them.
Separate it into two loaves, place on a baking sheet and bake for 40-50 minutes. When you poke it with a skewer, you should feel resistance. It shouldn't feel gummy.


Grasshopper Cake


Vanilla cake:
1/2 cup butter
2 cups sugar
1/2 cup vegetable oil
4 eggs
2 3/4 cups flour
2 teaspoons baking powder
1/4 teaspoon salt
1 cup milk
1 tablespoon vanilla

Preheat oven to 350 degrees. With an electric mixer beat the butter and sugar until fluffy then add in vegetable oil. Continue to beat until doubled in bulk and it is white and creamy. Add in eggs, one at a time. In a separate bowl mix together dry ingredients. Add the vanilla to the milk. Alternate adding the dry ingredients and the milk mixture to the sugar mixture. Don't over mix.


Chocolate Ganache:
3/4 cup heavy cream
1 tablespoon butter
9 ounces semi sweet chocolate chips

In a saucepan, heat the cream and butter until it almost boils. Remove it from the heat and mix in chocolate chips. Let cool

Mint Frosting:
1 cup sugar
1/4 cup water
4 egg whites
1 1/2 cups butter
1 tablespoon vanilla extract
1 tablespoon mint extract

In a heavy saucepan mix together 3/4 cup sugar and water. Boil until it reaches soft ball stage, 230-240 degrees. While waiting for sugar, beat together egg whites and remaining 1/4 cup sugar until foamy in a stand mixer. With the mixer on medium speed, pour the hot sugar into the egg whites. Do this very carefully! Pour it down the side of the bowl. Beat on high speed until the side of the bowl is room temperature. Add in the butter and continue to beat until it comes together. Add in vanilla and mint. Color as desired.

Layer the cake then chocolate ganache and top with mint frosting. Yum!

Thursday, January 12, 2012

one down...

I want to start this post off by saying this was probably the best soup I have ever made and I have made a lot of soups. I made Jenna's Asian chicken noodle soup and was blown away by the results. It was super simple to make and it just made me feel good!
The slight spice from the ginger and the jalapeno was perfectly balanced the the noodles and the cilantro. I wasn't surprised by the results because every recipe I've made from eat live run has been fabulous. This recipe will definitely be added to my list of regular recipes!
The only change I made was that I didn't add the rice vinegar because I didn't have any in my house...oops!


Chinese Chicken Noodle Soup
Recipe from Eat, Live, Run

Ingredients:
1 lb boneless, skinless chicken breasts, cut into chunks
2 cloves garlic, minced
1 tbsp minced fresh ginger
1 tbsp sesame oil
1/4th tsp salt
6 cups chicken broth
1 jalapeno, thinly sliced
3 green onions, sliced
2 tbsp soy sauce
1 tbsp rice vinegar
2 baby bok choy, chopped
5 oz chinese noodles (about half a package)
sriracha sauce for serving (optional)
chopped cilantro for serving (optional)


Directions:
Heat the sesame oil over medium high heat in a large heavy-bottomed stock pot. Add the minced garlic and ginger and briefly saute for about 30 seconds. Add the chicken and bok choy, sprinkle with salt, and saute for another three minutes until chicken has turned white but not completely cooked all the way through.
Add the chicken broth, jalapeno and green onions to the pot and bring to a simmer. Cook for 15 minutes until chicken is done.
Meanwhile, cook the noodles in boiling salted water, drain and rinse with cold water. Set aside.
Add the rice vinegar and soy sauce and stir. You can add a little more salt if you like, but taste first because soy sauce already contains a lot of salt! Add the noodles to the pot and serve with chopped cilantro and sriracha sauce on the side.
Time:
45 minutes

Monday, January 9, 2012

12 recipes for 2012

I like to consider myself a bit of a foodie. There are very few things I love more than spending time in the kitchen cooking delicious food for myself and for my favorite people. Most people just assume that with my restricted diet (I don't eat red meat, pork, anything ground, anything in a tube, or shellfish) that I don't eat much. But in reality, aside from meats, I will eat just about anything. Put any preparation of any vegetable in front of me and I'll at least taste it, but more than likely, I'll love it.
One of my goals for 2012 is to cook some recipes that I've never tried before. This could be anything from a different flavor profile or cooking with different ethnic foods. I've been pouring through foodgawker looking at photos and looking through different recipes and this is the list of 12 different foods to try in 2012.
I'd love to get your suggestions too! One of my favorite things about foodgawker is reading the blogger's perspective on the recipe. I love making recipes based on other people's reviews. So link me to your favorites!!

Polenta Squares with Mushroom Ragu from Running to the Kitchen

Pumpkin Spice Pull-Apart Bread by Willow Bird Baking

Coconut Oatmeal from The Eccentric Cook

Spinach and Artichoke Stuffed Mushrooms by The Curvy Carrot

Thick and Creamy Potato Latkes from Sweat Pea's Kitchen

Grilled Angel Food Cake by Panini Happy

Winter Chop Chop from With Style and Grace

Bourbon Pecan Pie Brownies by The Daily Waffle

Asian Chicken Noodle Soup from Eat Live Run

Scallion Meatballs with Soy-Ginger Glaze by Smitten Kitchen

Cranberry Chipotle Ketchup From The Type A Housewife

Wheat Berry Salad from Spoon Fork Bacon

Well friends, there you have it, 12 must make recipes in 2012. I can't wait to get your suggestions too!

Friday, December 23, 2011

tipsy turtle friday!

Happy Friday my lovely friends! Christmas is in 2 days!! TWO DAYS! Are you ready? I definitely am! Today is Christmas Eve in my sister's life which means the big man comes to her house tonight to bring presents to my niece. They started that tradition years ago so they could experience the magic of Christmas morning with her even though they only have her on Christmas Eve. (She spends Christmas day with her mom) So today marks day one of our three day extravaganza and I'm super excited.
First I want to share with you my absolute favorite Christmas treat recipe. It's for tipsy turtle bark. It couldn't be easier and it is seriously delicious.


Tipsy Turtles:
1 bag good quality chocolate chips
1 bag chewy caramels
2 tablespoons heavy cream
1/4 cup whiskey
1 cup chopped pecans

Directions:
Melt chocolate and spread to about 1/8-1/4 inch thick on a nonstick surface. I use a silicone mat. Put it in the refrigerator to help it set a bit faster. While chocolate is setting, melt caramel with the heavy cream and whiskey. Once smooth pour it over the set chocolate. Top with chopped pecans and refrigerate until caramel is also set. Cut into squares.
Proceed to eat the entire tray. Then repeat!
I always have to make two batches because I eat one myself!!

Now onto my favorite link up!! For Friday fancies this week we're dreaming of a white Christmas. I don't think that we'll get to enjoy snow this Christmas, but I'm still hoping! I decided to go pretty darn fancy and with a "winter white." This is definitely not what I'll be wearing on Christmas day, but I wish I was! I wish there was a holiday event that required this dress, it is just gorgeous!


winter white


I hope you all have a magical holiday weekend. Merry Christmas!

Thursday, December 22, 2011

peanut butter kisses

Peanut butter and chocolate. Can you think of a better combination?? It is definitely one of my favorites. Perfect mix of slightly salty and sweet. Yum. These cookies have a bunch of different names, I think Hershey's calls them peanut butter blossoms, but I've always called them peanut butter kisses. Adorable and delicious they are a fabulous Christmas treat!


Peanut Butter Kisses:
1/2 cup butter
1 cup peanut butter
1/3 cup granulated sugar
1/3 cup dark brown sugar
1 egg
2 tablespoons milk
2 teaspoons vanilla
1 1/2 cups flour
1 teaspoon baking soda
1/2 teaspoon salt
48 hershey kisses, unwrapped

Directions:
Cream together the butter, peanut butter and the sugars until fluffy. Add in the egg, milk and vanilla and beat for 2-3 minutes. Finally mix in the flour baking soda and salt.
Form 1 teaspoon (ish) sized balls of dough and put them on the cookie sheet. Once evenly spaced, press a kiss into each one and bake for 10 minutes at 350 degrees.
Let cool for a few minutes before trying to move them.
These are a little bit softer than normal peanut butter blossoms because of the extra peanut butter, it just makes them better in my opinion!!

Tuesday, December 20, 2011

molasses kringles

I've made gingerbread for the past 10 years, every single Christmas. It's delicious, but definitely a lot of work. This year I decided to branch out a little bit and instead of doing the "roll and decorate" gingerbread, I wanted to try a chewy molasses cookie. After searching foodgawker for what seemed like hours, I decided to go with a recipe from What Megan's Making for molasses kringles. They certainly did not disappoint. They are soft, chewy, spicy and just a bit sweet. I when I make them again I'll ditch the glaze though. I think it made them just a bit too sweet. If you want the recipe for the glaze, check out Megan's original recipe!


Molasses Kringles:
3/4 cup butter
1 cup brown sugar
1 egg
1/4 cup molasses
2 1/4 cups flour
2 tsp baking soda
1/4 teaspoon salt
1 teaspoon cinnamon
1 teaspoon ginger
1/2 teaspoon nutmeg

Directions:
Preheat oven to 350 degrees. Cream together the butter and brown sugar until very light and fluffy. Add in the molasses and egg and beat until well combined. Mix in the flour, baking soda, salt and spices. Mix until just combined.
Roll into balls and place on a cookie sheet. On my 1/2 sheet pan I fit 20 cookies and they barely fit.
Bake 10 minutes until lightly browned on edges. Remove from oven and let cool for 5 minutes on cookie sheet.

Monday, December 19, 2011

nyt chocolate chip cookies

If you've read any blogs during the holidays over the past few years, I'm sure you've heard of the New York Times chocolate chip cookies. There are a million chocolate chip cookie recipes out there. They go from super simple to really complicated. 


This one is more on the complicated side. It takes two different types of flour and it has to sit overnight in the refrigerator. When all is said and done, they are definitely delicious. I'm not sure if they're really worth all the extra time and work, but they are delicious. The best thingt about them is that even if you over cook them a tiny bit, they are still nice and chewy! I tried not to change anything, but I decided to go with smaller chunks of chocolate and smaller cookies. Cookies that are FIVE inches are huge, especially when there are so many other cookie choices around to try. I'm not going to include the recipe here, but check it out. They're at least worth a try!

Tuesday, December 13, 2011

an old favorite

Last night I was stuck in my living room glued to the tv after I went downstairs to let the dog out and found White Christmas on tv. I love the movie. It's definitely a holiday classic in my family. 


This little blog is not my first, although so far I'm much better with it! The absolute most popular post on my previous blog was one about salted caramels. I made amazing chewy salted caramels last year. They are super decadent and delicious. I decided to share them with you guys today because they are too good to miss! I'll be making them today, a giant batch to share with all of my friends!
(these pictures are from my old blog - I'll update later today with some new shots!)


Sea Salted Chewy Caramels:

5 tablespoons butter
1 cup heavy cream
1 teaspoon vanilla extract
1/4 teaspoon sea salt
1 1/2 cups sugar
1/4 cup light corn syrup
1/4 cup water

Line a 9x9 baking pan with foil and spray foil with vegetable oil spray.

In a small sauce pan melt the butter, once melted add in the heavy cream, vanilla, and salt. Bring to a slow boil stirring frequently. Remove from heat

In a 4 quart sauce pan with high sides mix together sugar, corn syrup and water. Boil without stirring (a gentle swirl of the pan occasionally is helpful to avoid hot spots) until a light golden color, approximately 310 degrees. On my gas stove this takes about 10 minutes.

Add in the heavy cream mixture. BE CAREFUL! It will boil up violently!!! Return to heat and stir frequently until mixture reaches 248 degrees, it took about 8 minutes on my stove. Pour into the lined baking pan and let cool.

Tuesday, November 15, 2011

sweet and tangy


Over the weekend I got an irresistible urge to make cranberry muffins. I make orange cranberry cookies at Christmas time and was feeling the flavor combination. So I went to the grocery store, picked up a bag of fresh cranberries and I was all set.


These muffins are delicious. They are definitely tart, as they are packed full of plump cranberries and copious amounts of fresh orange juice and zest. I'd definitely suggest them to anyone who likes tangy foods! I barely tweaked the recipe adding a little more zest, juice and flour.

With this recipe I'm once again liking up with My Baking Addiction for the Holiday Recipe Exchange! I love this link up. Come join the fun at the My Baking Addiction and GoodLife Eats Holiday Recipe Swap sponsored by Chicago Metallic!!


Cranberry Orange Muffins:
Adapted from here and here:

Ingredients:
4 1/4 cups flour
2 teaspoons baking powder
1 1/2 teaspoons baking soda
1 teaspoon salt
2 1/2 cups fresh cranberries
2 large eggs
1 3/4 cups orange juice
1/2 cup vegetable oil
1 1/2 cups sugar
zest of 3 large oranges

Mix together all the dry ingredients, once combined stir in cranberries. Make sure to coat cranberries in flour, this will stop them from sinking to the bottom of the muffins. In a separate bowl stir together all the wet ingredients and zest. Add in the dry ingredients and stir until just combined - some lumps are ok. Divide into muffin tins. I did about 1/4 cup of batter per muffin and got 22 muffins. Bake at 400 degrees for 15 minutes.

Sunday, November 6, 2011

This morning I'm off to run with my mom, but I wanted to drop by with my weekly Bloggers for Health post. This week's prompt is about food and I'm super excited about it!! Before I get to my favorite recipe, I want to say how much I'm enjoying these posts. I think they have helped keep me focused on my overall goals. I had pizza for dinner last night with my mom and sister, but I balanced it out through the rest of the day focusing on lots of vegetables and natural foods. I think the thing I've done that has helped me the most has been to incorporate fruits and vegetables with every meal/snack I eat. It sounds a lot easier than it is! Eating a lot of vegetables is what everyone recommends as a way to lose weight. Duh! Vegetables have very few calories, generally high fiber and can be quite filling on their own, of course you'll lose weight if you eat only veggies. I love pretty much any vegetable you can throw at me, but I was eating way fewer of them than I should have been. It has taken conscious effort to include them in every single time I eat. I can definitely feel a difference though, the fuel and nutrients have definitely made me FEEL better.
So, this week's prompt was a favorite healthy recipe. I'm going to share one of my favorite ways of sneaking some fruits in. Apple butter. It just sounds indulgent, but really it is really great for you. Apples are great for you. They're a fabulous source of fiber, some great vitamins and they really taste amazing. The best part about this recipe is that it is unsweetened, it lets the natural sweetness of the apples shine through and it could not be easier to make!


Apple butter:

  • 10 medium - large apples, cored but with skins on - I used a variety of apples to have more flavor. Avoid grannysmith - they're quite tart and we're going for sweet. Empire, Macintosh, Cortland, Gala, Pink Lady etc all work great.
  • 1 Heaping tablespoon cinnamon
  • 2 teaspoons nutmeg
  • 1 teaspoon ginger

Core and roughly chop the apples, leaving the skins on. Put them in an ovenproof pot with about 1" of water in the bottom of the pan. Boil/steam apples until tender. Puree with immersion blender (can be done in a normal blender too I assume) until smooth. Preheat oven to 300 degrees. While oven is preheating continue to boil the pureed apples and stir in cinnamon, nutmeg and ginger. When oven is preheated, move the pot (covered) to the oven and bake for 2-3 hours. Stir every half hour or so. It will turn a deep brown color and get thick.

I love the apple butter smeared on toast, on pumpkin bread, with cheddar cheese, in my oatmeal, on ice cream...the possibilities are endless. Yum!
I hope you enjoy it as much as I do!!

Thursday, October 6, 2011

chocolate

I posted Saturday about this year's holiday recipe exchange that My Baking Addiction and Goodlife Eats are hosting. This week I'm joining in with the fun with a flourless chocolate cake!
I've tried a few flourless chocolate cake recipes before and they've all been great. My favorite one is from epicurious. I've made a couple of changes that I think really enhance it.


Flourless Chocolate Cake
Adapted from Epicurious

2 ounces good quality bittersweet chocolate
4 tablespoons butter
1/4 cup + 2 tablespoons sugar
2 extra large eggs
1/4 cup cocoa powder
1 tablespoon strongly brewed coffee

Preheat oven to 375 degrees. Coat 4 ramekins with butter and cocoa powder Melt chocolate with butter in the microwave, 30 seconds at a time. Stir in sugar. Once combined whisk in eggs, cocoa powder and coffee. Once combined pour into ramekins and bake for 15-20 minutes until the top has a thin crust.

 Come join the fun at the My Baking Addiction and GoodLife Eats Holiday Recipe Exchange sponsored by Scharffen Berger.

Tuesday, October 4, 2011

learning to love

Hello my good friends! I'm so sorry I missed you yesterday! I got overwhelmed over the last few days and just didn't have time to write a new post. But now I'm nicely back into the swing of things and I'm writing this up while sitting in my gym clothes getting ready to go work my tush off with a killer elliptical (ok really it's an arc trainer) workout.
I have been trying really really hard to teach myself to like oatmeal. Everyone raves about it and the health benefits and so on. My parents are not oatmeal people to say the least. My dad's idea of a daily breakfast food would be a giant bowl of rice crispies with a ton of extra sugar and a ton of milk. Growing up mom would drink coffee and have a cigarette (yuck!!! so glad she finally quit! Go mom!!!). So we generally just had cereal. The texture of oatmeal takes some serious getting used to. It is so....gummy?
Well the good news is that I have finally found a method and recipe that I am completely in love with!


Pumpkin Oatmeal
1/4 cup steel cut oats
1 1/2 cups water
2 teaspoons brown sugar
1/3 cup canned pumpkin
2 dashes cinnamon

Cook oats in water for the first 20 of the 25 minute cooking time. Add brown sugar and cook for the remaining 5 minutes. Add in pumpkin and cinnamon. Cook until heated through.

Friday, September 2, 2011

salsa

I don't want the entire month of September to be full of sad sappy posts, but I think it is bound to happen at least a little bit. My dad died 9/19/04 and with the 7 year anniversary creeping up on us I think he is on our minds even more so than every other day.
Over the summer of 2004 my parents started making really big strides to try to live a healthier lifestyle. They both joined the gym and my very picky eater of a father started to try to branch out a little bit with new foods. One of his loves was always salsa. One day he decided that rather than buying the premade kind, he would attempt to make his own. For most of the month of August salsa making overtook the weekends. We were working towards the perfect pico de gallo style salsa. We tried everything from different types of tomatoes, methods of peeling the tomatoes, how fine to chop the onion, how much lime vs salt to add and so on and so on! Eventually we got a recipe that we loved. Unfortunately it is done mostly by feel and taste, but I managed to jot down the basics to share with you today!
I suck a little and didn't take all the pictures I wanted to, but hey - I was working from memory!
Start with 6 gorgeous ripe tomatoes

Peel them. I found that scoring the bottoms and dipping them into boiling water for 30 seconds and quickly removing
them works best. The skin basically falls right off!

Ta-Dah! Mix all ingredients together for giant bowl of amazing deliciousness.

Proceed to eat 2/3 of salsa on tortilla chips. Then eat 1/2 of a bottle of papaya enzyme to help with the gas bubble
created by the salsa consumption.
Daddy's Salsa:
6 large tomatoes, peeled
2 red onions
2 whole jalepeno peppers
1 lime
1 bunch cilantro
1 teaspoon (ish) salt

Directions:
  • Peel the tomatoes. It is easiest to peel ripe tomatoes by cutting a small x into the bottom of the tomato and submerging it into boiling water for 30 seconds. *I dipped them in and removed them with a slotted spoon and put them on my counter to let them cool before peeling.
  • Dice the tomatoes. *I like them pretty darn small. Since you won't be cooking this salsa, it is best to chop them pretty tiny.
  • Dice the red onion. This should be even smaller than the tomato. You don't want to bite into any big chunks of onion. Really the best method would be to use the fine dice option on a mandoline.
  • Grate the whole jalepeno, seeds and all.
  • Zest and juice the lime.
  • Chop the cilantro super tiny.
  • Mix all ingredients together in a large bowl. Use a bowl that is one size bigger than what you think you'll need. Stirring the salsa is much easier with lots of extra room. Once you add the salt the salsa gets a bit soupy.
  • Let it stand for as long as you can wait before eating it, I suggest at least 4 hours but really overnight is best.
I dug in immediately.